AutoPosSizeAndSLTP
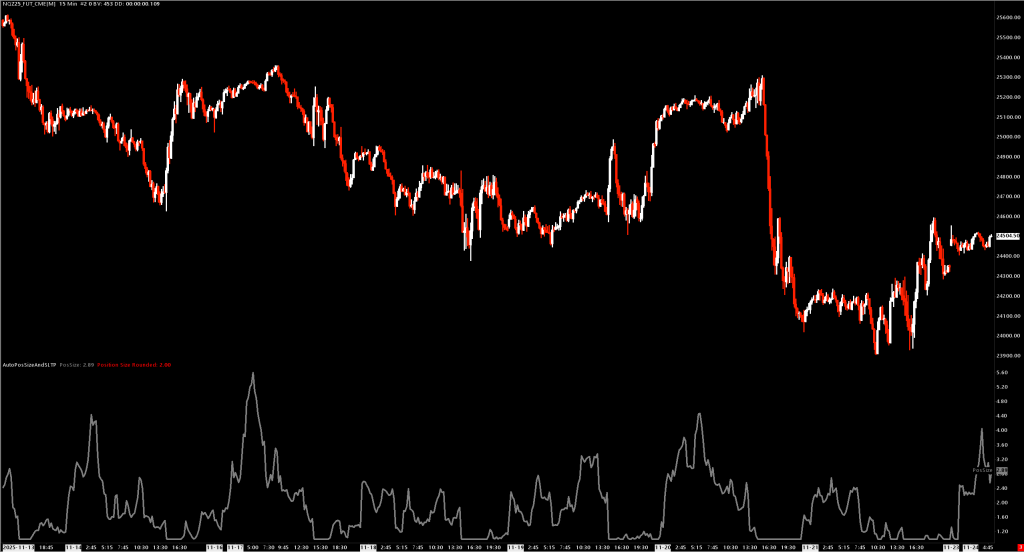
Automatic position sizing with integrated order entry, stop-loss, profit targets, and breakeven management.
Overview
AutoPosSizeAndSLTP calculates optimal position size based on market volatility (ATR) and provides one-click/one-key order entry with automatic bracket orders. Think of it as a complete trading execution system that:
- Sizes positions based on current volatility
- Sets stops and targets in dollar amounts (not ticks)
- Manages risk with automatic breakeven moves
- Executes trades via menu or keyboard shortcuts
Key Features
Volatility-Based Position Sizing
- Uses Average True Range (standard or volume-weighted)
- Higher volatility = smaller position size
- Lower volatility = larger position size
- Respects min/max position limits
Dollar-Based Risk Management
- Set stop loss as a dollar amount (e.g., $50 max loss)
- Set profit target as a dollar amount (e.g., $100 target)
- Study automatically calculates tick distances based on position size
Integrated Order Entry
- Market orders (Buy/Sell)
- Limit orders at pointer price
- All orders include automatic stop and target brackets
- Scale-in and scale-out support
Breakeven Management
- Automatic stop move to breakeven when target % reached
- Configurable breakeven trigger percentage
- Offset to cover fees/commissions
Inputs
Position Sizing
| Input | Default | Description |
|---|---|---|
| Length | 60 | ATR lookback period |
| Min Position Size | 1 | Minimum contracts |
| Max Position Size | 3 | Maximum contracts |
| Smoothing Type | Wilder's | Moving average type for ATR |
| Use Volume Weighted ATR | Yes | Weight ATR by volume for more responsive sizing |
| Auto Adjust Symbol Max Size | Yes | Automatically update Sierra Chart's symbol max position |
Risk Management
| Input | Default | Description |
|---|---|---|
| Stop Loss Amount ($) | $50 | Maximum dollar loss per trade |
| Profit Target Amount ($) | $100 | Target dollar profit per trade |
| Enable Move to Breakeven | Yes | Auto-move stop to breakeven |
| Breakeven Trigger (% of Target) | 50% | Move stop when this % of target reached |
| Breakeven Offset (Ticks) | 6 | Ticks beyond entry for breakeven stop |
| Target To Breakeven Offset (Ticks) | 3 | Offset for "Move Target to Breakeven" function |
Order Entry
| Input | Default | Description |
|---|---|---|
| Enable Order Entry | Yes | Enable menu and keyboard order entry |
| Enable Keyboard Shortcuts | Yes | Enable hotkey trading |
| Initial Position Quantity | 1 | Contracts for new position entries |
| Scale Out Quantity | 1 | Contracts to reduce when scaling out |
| Allowed Sides | Both | Restrict to Long Only, Short Only, or Both |
The
Allow Only One Trade Per Barinput is reserved but not honored —sc.AllowOnlyOneTradePerBaris forced to 0 every tick to keep scale-in orders working. Setting it to Yes in study settings has no effect.
Keyboard Shortcuts (Customizable)
| Action | Default Key |
|---|---|
| Buy Market | B |
| Sell Market | S |
| Buy Limit | N |
| Sell Limit | D |
| Cancel Opening Orders | C |
| Move Target to Breakeven | T |
How Position Sizing Works
The formula: Position Size = Max Size / (ATR / 10), clamped to [Min, Max].
Example:
- Max Position Size: 3 contracts
- Current ATR: 15 ticks
- Calculation: 3 / (15/10) = 3 / 1.5 = 2 contracts
When volatility is high (large ATR), position size decreases. When volatility is low (small ATR), position size increases up to the maximum.
If Min Position Size is misconfigured higher than Max Position Size, Min is silently clamped down to Max so the result never exceeds the declared maximum.
Stop / Target Sizing Across Scale-In
Stops and targets are sized so that the full position at max size equals Stop Loss Amount ($) / Profit Target Amount ($).
When scaling in with smaller Initial Position Quantity, each individual order carries proportionally smaller per-order $-risk:
- Max target = 3, Initial qty = 1, Stop = $60 → first fill risks $20, full position risks $60.
- Scale-in orders inherit the same offsets so the combined position reaches the configured $-risk only at full size.
Scale-out orders submit naked (no new brackets on the scale-out order itself). The study then explicitly reconciles working stops + targets on the exit side so that:
sum(working stop qty on exit side) == sum(working target qty on exit side) == abs(position)
Reconciliation is deferred one study tick after the scale-out submit. Sierra's ModifyOrder / CancelOrder calls are asynchronous, so doing them inline before SellEntry/BuyEntry could leave the stop at its original quantity when the scale-out reached the matching engine — causing the stop to fill alongside the scale-out and over-flatten the position. By deferring to the next tick, Sierra has already processed the scale-out fill, the actual position is read via GetTradePosition, and excess bracket quantity is removed via ModifyOrder (preferred — keeps the position protected) or CancelOrder (when an entire bracket leaf is no longer needed).
Log lines confirm the cleanup:
Scale-out reconcile: shrunk stop order 12345 from qty 2 to 1 @ 29591.25
Scale-out reconcile: cancelled target order 12346 (qty 1) @ 29798.75
Order Types
New Position
- Uses Initial Position Quantity
- Attaches stop and target based on dollar amounts
- Enables breakeven management if configured
Scale-In (Adding to winning position)
- Checks remaining capacity vs max position
- Uses Initial Position Quantity (or remaining capacity if smaller)
- Attaches new brackets
Scale-Out (Reducing position)
- Uses Scale Out Quantity
- Reduces position via Sierra's
SupportTradingScaleOut - Brackets on the exit side are reconciled to match the reduced position on the next tick (see above)
No Auto-Reversal
sc.SupportReversals is forced to 0 so an opposite-direction entry against an existing position is never re-interpreted as "close everything + open the opposite". To flip direction:
- Press Cancel Opening Orders (or close manually).
- Place a new entry once the position is flat.
This prevents the inconsistent "close 1 vs close 2" behavior seen when Sierra mixed scale-out and reversal interpretations on the same SellEntry/BuyEntry submit.
Menu Commands
Right-click chart to access:
- Buy Market (Calc Size) - Market buy with calculated sizing
- Sell Market (Calc Size) - Market sell with calculated sizing
- Buy Limit at Pointer (Calc Size) - Limit buy at crosshair price
- Sell Limit at Pointer (Calc Size) - Limit sell at crosshair price
- Move Target to Breakeven - Move profit target to entry + offset
- Cancel Opening Orders - Cancel limit entries, keep stops/targets
Requirements
- Sierra Chart with Trade Mode enabled
- Chart Trade Mode must be active for order entry
- Works with simulation or live trading
The study keeps
sc.SendOrdersToTradeServicein sync withsc.GlobalTradeSimulationIsOnon every call, so togglingTrade > Trade Simulation Mode On(or starting Replay) is picked up immediately without re-applying the study.
Sierra Chart setup (one-time)
The study assumes Sierra is configured to not auto-add anything to the orders it submits. Without these settings the study's bracket math collides with Sierra's own bracket / scaling logic and you get phantom brackets, mismatched quantities, or unexpected reversals.
Run through this checklist once per chart/trade account:
- Trade Template — clear default attached orders.
Trade > Trade Templates...→ set attached stop, target, and any "attached order on entry" options to None / 0 / no offsets. The study supplies its own brackets viaStopAllOffset/Target1Offseton new entries and scale-ins; the Trade Template must not add anything on top. Symptom if not cleared: after a scale-out a fresh bracket pair appears "for the wrong direction" (e.g. a long-style stop below price after scaling out of a short), often at very wide default offsets. - Trade Window — no Stop / Target / Trail set. Open the Trade Window and clear the Stop, Target, and Trail Stop fields (set to 0 / blank). The study's bracket sizing comes from the input dollar amounts, not the Trade Window.
- Turn off Sierra's native scaling.
Trade > Trade Window→ disable the built-in scale-in / scale-out buttons and any "automatic scale order" options. The study handles scaling via its own menu items and hotkeys. - Disable "Maintain Same Quantity for OCO Orders". In the trade configuration, turn this off. With it on, Sierra forces every OCO leaf to match the latest qty change, which fights the study's reconciler when it shrinks one bracket but not its pair.
- Disable Sierra's native chart-trade hotkeys.
Global Settings > General Settings > Trading→ unbind the built-in keyboard shortcuts (Buy, Sell, Flatten, etc.) so they do not double-fire alongside the study's hotkeys. The one exception is Move To Breakeven — leave it bound if you want Sierra's built-in MTBE in addition to the study'sThotkey.
Installation
- Place
AutoPosSizeAndSLTP.dllin your Sierra ChartDatafolder - Add study to chart: Analysis > Studies > Add Custom Study
- Search for "AutoPosSizeAndSLTP"
- Enable Chart Trade Mode for order entry functionality
Exported Study Functions
| Function | Purpose |
|---|---|
scsf_AutoPosSizeAndSLTP | Main study — position sizing + order entry |
An earlier
scsf_GetCalculatedMaxPositionSizehelper has been removed. It read from per-study persistent storage and therefore could never see the value written by the main study running in a separate study instance.